
You approve a beautiful logo, your sign company builds it, and the finished sign on your wall looks… wrong. The letters are thinner than you expected. The red is a different red. The tagline wraps awkwardly because the cabinet is shallower than the rendering suggested.
Nine times out of ten, the failure didn’t happen in fabrication. It happened in the artwork stage — in CAD sign design, the digital workflow that turns your logo and ideas into a sign a factory can actually build. Understanding this workflow is the cheapest quality insurance a sign buyer can get: mistakes caught in CAD cost a few clicks; mistakes caught in the shop cost re-cut material, re-printing, and schedule.
Quick answer
CAD sign design is the digital artwork and technical-drawing workflow that converts your logo, brand colors, and dimensions into production-ready files: vector artwork, scaled layouts, cut paths, electrical layouts, mounting details, and approval proofs. A professional sign is designed in vector software (Adobe Illustrator-class), laid out at true scale, technically detailed for the fabrication method, proofed for your written approval, then converted into machine-ready files for CNC routers, lasers, and printers. Supplying the right source files at the start — vector logo files, real dimensions, site photos — is the single biggest lever on speed and accuracy.
What “CAD sign design” really means (and what it doesn’t)
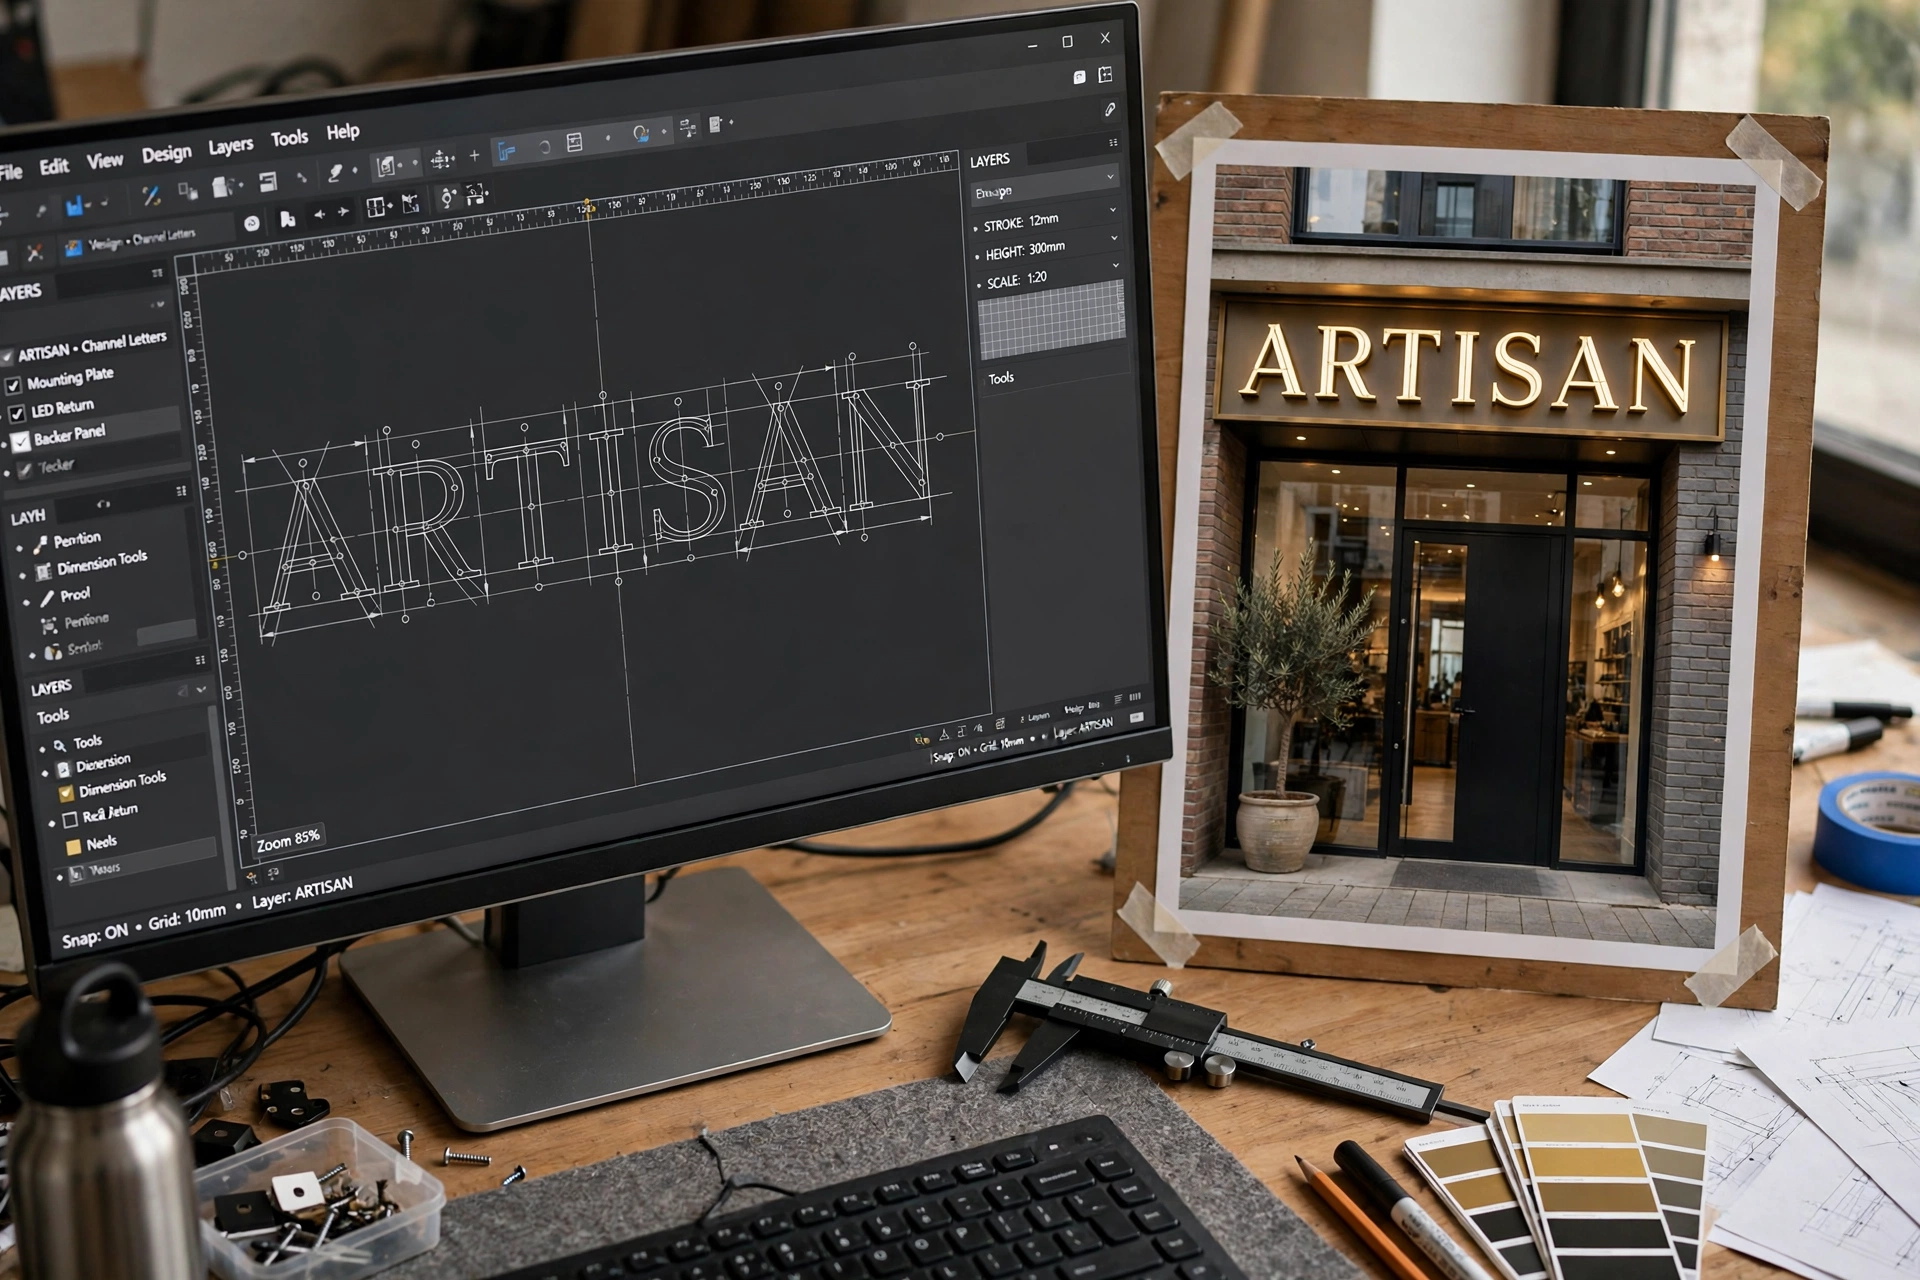
CAD sign design is not a special kind of sign, and CAD is not a sign material. It is the design method behind professional sign production. Instead of a hand sketch or a rough idea, the designer builds an accurate digital drawing that defines exactly how the sign will be made: dimensions, letter shapes, logo placement, colors, materials, cut lines, and mounting details.
That drawing serves three audiences:
- You, the buyer — to see and approve exactly what you are buying before it is built.
- The fabricator — to cut, bend, print, and assemble the sign accurately, without interpretation.
- The installer — your local licensed contractor — to mount it in the right place, the right way.
Without it, every downstream step is guesswork. With it, changes are cheap (a few clicks) instead of expensive (re-cut material).
Why professional signs are built from vectors, not pictures
The single most important concept in sign artwork is vector vs. raster:
| Vector | Raster | |
|---|---|---|
| Made of | Mathematical paths and curves | Pixels in a grid |
| Scales to | Any size with zero quality loss | Gets blurry/pixelated when enlarged |
| Used for | Logos, lettering, cut paths, line art | Photos, complex imagery |
| Common formats | AI, EPS, vector PDF, SVG | JPG, PNG, TIFF, GIF |
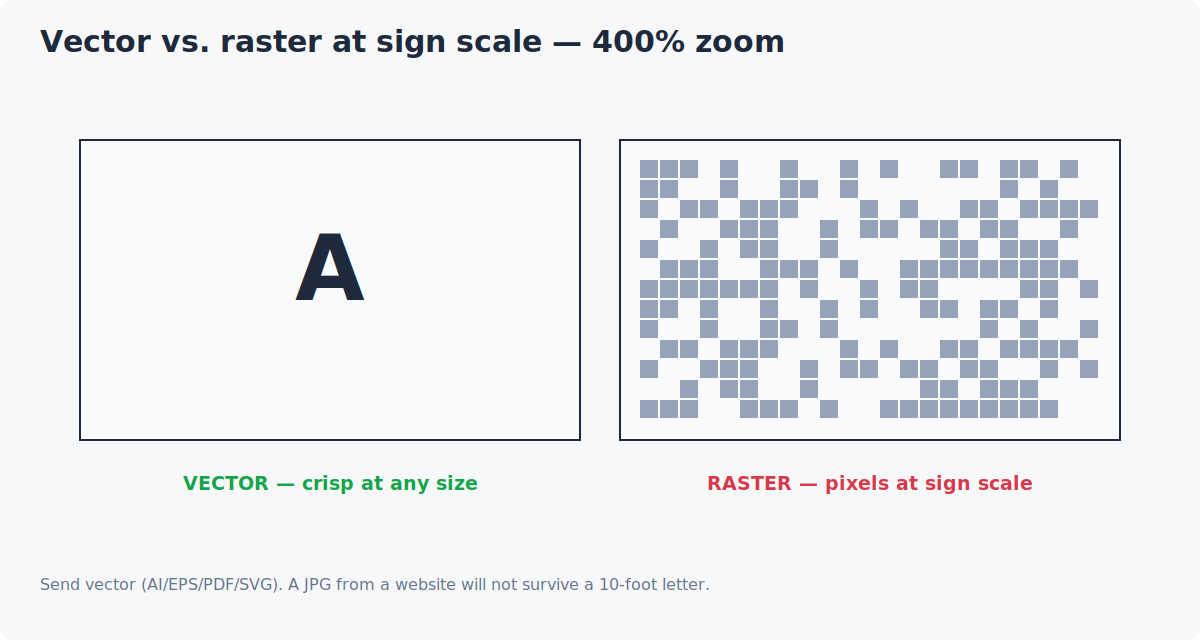
A logo pulled from your website (a small PNG) cannot be blown up to 4-foot letters without turning to mush. A vector file scales from a business card to a building facade with no quality loss — and, critically, a CNC router or laser cutter can follow vector paths to physically cut the sign’s shapes. That is why every fabricator asks for vector artwork.
What to send: AI, EPS, or vector PDF from your logo designer; SVG works too.
What causes delays: a JPG screenshot, a Word document, a photo of your old sign, or a low-resolution Canva export. Those can be starting points — a designer can redraw them as vectors — but redraw time adds to the schedule. Send the best source files you have. If your logo only exists as a JPG, say so upfront; a manufacturer redraws logos as a matter of routine, but it is a billed step, and hiding it doesn’t make it cheaper.
The design workflow, step by step
Here is how a professional custom sign moves from idea to production-ready files:
1. Discovery and brief
The designer learns the essentials: business name and logo, sign type, approximate size, installation location and surface, viewing distance, illumination needs, brand colors, deadline, and budget range. Photos of the installation site and the approach angle are worth more than a paragraph of description — a storefront photo taken from the driver’s seat tells the designer more about sizing than any spec sheet.
2. Artwork preparation
Your logo and graphics are converted into clean vector artwork. Text is converted to outlines (so fonts cannot shift or go missing on another computer), stray points are cleaned up, and colors are mapped to production references like Pantone or RAL. This is also where the designer asks the uncomfortable questions: is that gradient printable on vinyl? Will that hairline stroke survive as a 3-inch cut letter? A reseller skips this step. A manufacturer treats it as the foundation.
3. Layout and scaling
The artwork is laid out at real scale — or a documented scale — on the sign’s actual dimensions. Spacing, letter heights, and clearances are set for the true viewing distance, not for how the design looks on a monitor. This is where a sign that “looked fine in the mockup” gets corrected to work on the building: letters get taller for the road, clearances get wider for the brick joints, the logo gets repositioned away from the downspout.
4. Technical detailing
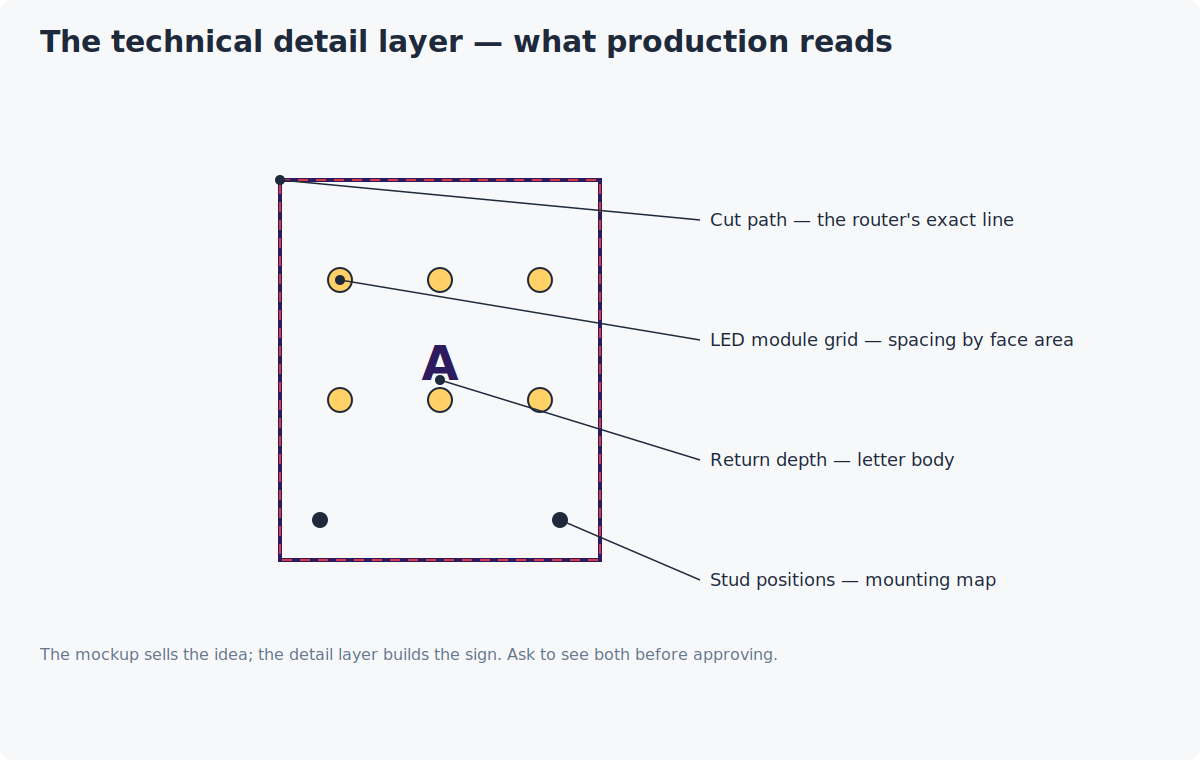
The layout becomes a buildable drawing. Depending on the sign type, this includes:
- Cut paths — the exact lines the router or laser will follow, with bridges and tabs where parts stay connected to the sheet.
- Stroke widths — minimum thicknesses so thin details survive fabrication (a 1/8-inch serif on a 4-inch letter is a breakage risk in acrylic).
- Returns and depths — the side walls of channel letters and dimensional letters, which set the shadow line and the illumination depth.
- Electrical layouts — LED module placement, spacing, and power supply locations for illuminated signs. Module spacing is a spec, not an art choice: too sparse and the face shows hot spots; too dense and you are paying for modules you can’t see. The Illuminating Engineering Society publishes the lighting standards behind this kind of layout work.
- Mounting details — stud positions, raceway locations, hole patterns, standoff depths.
- Elevations and side views — how the sign sits on the building or structure, including clearances from windows, cornices, and parapets.
This detailing is where factory-direct manufacturing shows. The same people who detail your sign build it, so the drawing reflects shop reality — material sheet sizes, machine tolerances, the way aluminum actually bends — instead of a graphic designer’s best guess.
5. The proof: what to check before you approve
You receive a proof — typically a to-scale rendering of the design on your building or in elevation, plus key dimensions and specifications. Nothing goes to production until you approve the proof in writing. Check these five things every time:
- Spelling and wording — including taglines, suite numbers, and hours. The proof is the last moment a typo is free.
- Colors — against Pantone/RAL references, not against your monitor. Screens lie; production references don’t.
- Sizes — overall dimensions and letter heights against the real mounting surface.
- Placement — the sign’s position on the building, clear of obstructions the photo showed.
- Specifications — materials, finishes, illumination type, and mounting method as quoted.
Changes after written approval usually mean rework charges. The proof stage is your leverage — use it.
6. Production files
After approval, the CAD files convert into machine-ready formats: toolpaths for CNC routers and lasers, print files for digital printers, and cut sheets for vinyl. The approved proof becomes the quality reference: fabrication is checked against the drawing, and the drawing matches what you signed.
How CAD detailing differs by sign type
The detailing discipline changes with the product. A few examples from the shop floor:
- Channel letters — return depth (typically 3–5 inches) sets the illumination chamber; letter backs carry the LED layout; trim cap color is a separate spec from face color. Fabrication from $129/letter for front-lit.
- Dimensional letters — thickness is the whole design decision (1/8-inch flat-cut vs. 2-inch fabricated); stud length must match the mounting surface. Fabrication from $6.50/letter.
- Monument signs — the CAD set includes foundation and footing details, not just the sign face. Fabrication from $2,900.
- LED neon — the tube path is drawn as a single continuous route; every tight bend is a fabrication constraint. Fabrication from $149.
- Blade signs — the bracket is drawn as a structural part, not an accessory; wind load is a line item. Fabrication from $590.
Common artwork problems that delay production
These are the five we see most often, in order of frequency:
- Raster-only logos — the #1 delay. Budget redraw time or find the vector original.
- Fonts not outlined — the proof looks right on your screen, wrong in the shop. Convert text to outlines before sending.
- Colors specified as screen values — “the blue from our website” is not a production spec. Pantone or RAL numbers are.
- Unrealistic scale expectations — a 40-character tagline that must be “readable from the highway” on a 4-foot cabinet. The math doesn’t work; the designer will tell you so.
- Late artwork changes — new logo version arrives after the proof is approved. Every downstream file regenerates.
Illustrative example: a restaurant sends a JPG of their menu-board logo for 3-foot channel letters. The designer redraws it as vectors (one billable step), discovers the script font’s hairlines are too thin to cut in acrylic at that size, thickens the strokes with the buyer’s approval on the proof, and the letters cut clean the first time. The alternative — cutting the thin version — would have meant broken strokes and a re-cut.
What to send your sign company: the file checklist
- [ ] Vector logo: AI, EPS, or vector PDF (SVG acceptable)
- [ ] Text converted to outlines, or the exact font files + license
- [ ] Brand colors as Pantone or RAL numbers (not screen grabs)
- [ ] Site photos: straight-on and approach-angle shots of the mounting surface
- [ ] Mounting surface details: brick, EIFS, glass, metal panel — and its width/height
- [ ] Approximate desired size and viewing distance
- [ ] Illumination preference: lit or non-lit
- [ ] Deadline and budget range
FAQs
Can I just send a photo of my existing sign?
Yes, as a reference — it tells the designer what you like. But it can’t be used as production artwork; it will be redrawn as vectors, which adds a step. Pair it with any original logo files you have.
What is a vector PDF vs. a regular PDF?
A PDF is a container. It can hold vector paths (infinitely scalable, cuttable) or just a raster image (a JPG in a PDF wrapper — not cuttable). If your “vector PDF” zooms in blurry, it’s a raster in disguise. Your designer can tell in seconds.
Do I own the production files?
Practices vary. At UrbanSign Works, the design work behind your sign — the layout, detailing, and production files — is part of delivering your sign, and your approved proof is your record of what was built. Ask any vendor this question before you start; it matters if you ever reorder.
How long does the design stage take?
It depends on artwork condition. Clean vector files with a clear brief move fast; raster-only logos needing redraw, or multiple revision rounds, add days. Our process: a free 3D mockup, targeted within two business days of a complete brief — and “complete brief” is doing real work in that sentence. The checklist above is what makes a brief complete.
Will the proof show my sign on my actual building?
A good proof shows the design to scale on your building or a clean elevation — not just a floating logo on white. If your proof doesn’t show the mounting context, ask for it. Placement surprises are the most expensive kind.
From idea to installed: what good looks like
Good CAD sign design is invisible. You never think about it — the letters fit the wall, the colors match the brand, the illumination is even, and the installer’s holes land exactly where the studs are. That invisibility is engineered, not accidental: it comes from vector discipline, true-scale layout, technical detailing, and a proof you actually read before signing.
The commercial terms are straightforward: insured freight delivery to the United States, Europe and Australia; standard fabrication targeted within 15 business days after final design approval; a two-year manufacturing warranty on qualifying products, subject to the written warranty terms. Installation is by your local licensed contractor — the CAD package includes the mounting details they need. Start with the file checklist above, and the rest of the workflow takes care of itself.
Next step: send your logo and site photos through our quote request and get a free 3D mockup — the first real CAD step of your sign, targeted within two business days of a complete brief. If you’re still budgeting, the business sign cost guide shows how pricing works across sign types.